Introduction
Object detection is a classic task in computer vision application. Human see the world through their eyes, and the recognition process is completed in our brains. But how can computers simulate such process?
The process we human recognize can be divided into 2 parts: perception and reasoning. A natural idea is to tackle the object detection task by using two seperate models: object location and classification. The representative works are most traditional RCNN based models. Basically such two-stages models must look at the image twice, one for extract the object region and the other for object classification. However, although RCNN based models have got high performance, they share one fatal drawback: slow. Low fps becomes the obstacle on our way to implement a real-time object detection system.
Luckily, YOLO was born.
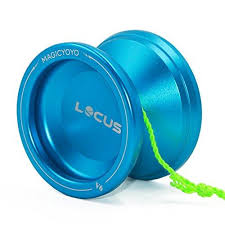
When I first saw this funny name, I just recalled a kind of toy I played when I was a little boy – yoyo 🤣
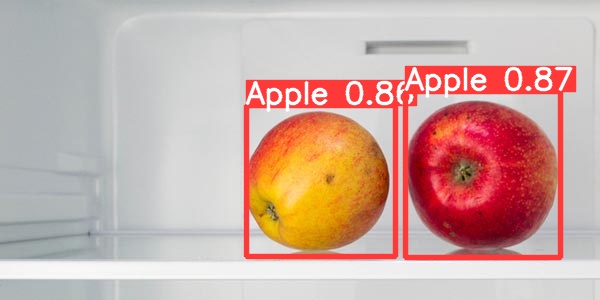
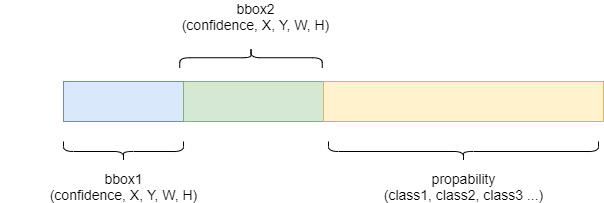
As the name says, You Only Look Once, the design idea of YOLO is to convert the two-stages pipeline into one-stage, treating it as a end-to-end regression problem. Both bboxes and labels are learned via regression model. In inference phase, the output comes out bboxes coordinates and labels at the same time! Intuitively I can feel how fast the reasoning speed such architecture could reach.
Since YOLOv1 was introduced in 2016, the father of YOLO Joseph Redmon continued to improve the model architecture and proposed YOLOv2 and v3. But the pity is that this genius guy declared to stop his research on YOLO since the powerful object detection framework had been used in military and privacy application. Therefore, YOLOv4 and v5 and YOLOx were proposed by other researchers.
Today I gonna to talk about the lastest version of YOLO – YOLOv5, mainly focus on how to train it using custom dataset. Since the paper of YOLOv5 has not been published yet, I will not deep in too much details for the design and code implementation of YOLOv5 (maybe will do it in the future).
So, let’s get started!
Brief for YOLOv5
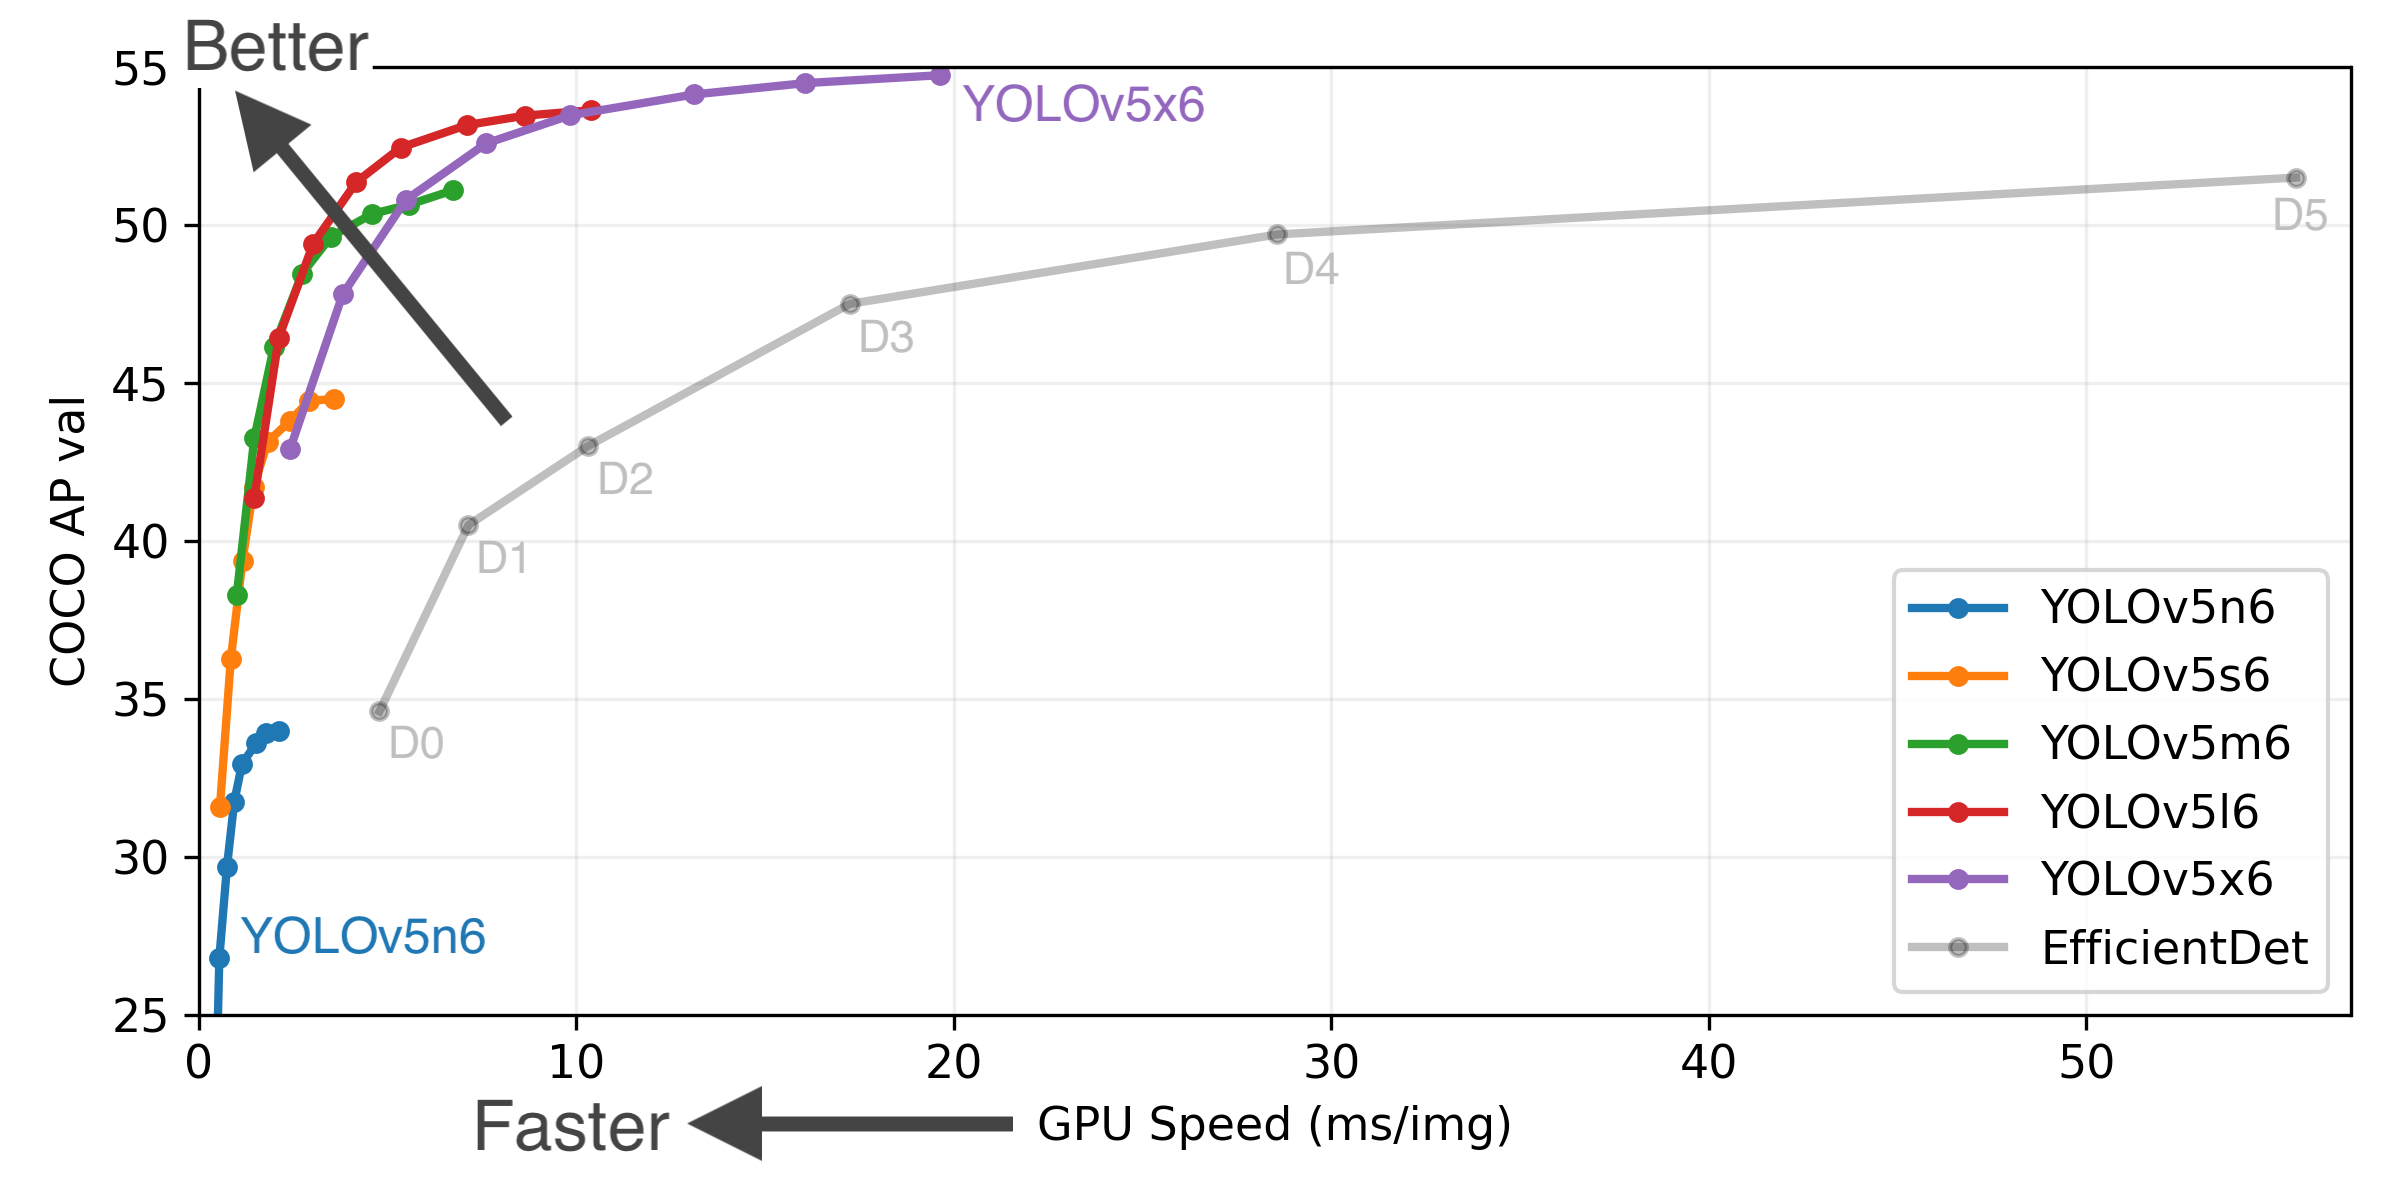
The code for YOLOv5 can easily be gained from Github, with well written document and guidance. The repositorty is still updated at high frequency. After countless iterations, and The original creative idea have now become a sophiscated system. The experiment result given by the author proves the strong performance of YOLOv5.
We can clone the repository to local (All codes are run on Colab)
!git clone https://github.com/ultralytics/yolov5  # clone repo
%cd yolov5
%pip install -qr requirements.txt  # install dependencies
Walk into the /yolov5 directory and have a look at the file structure.
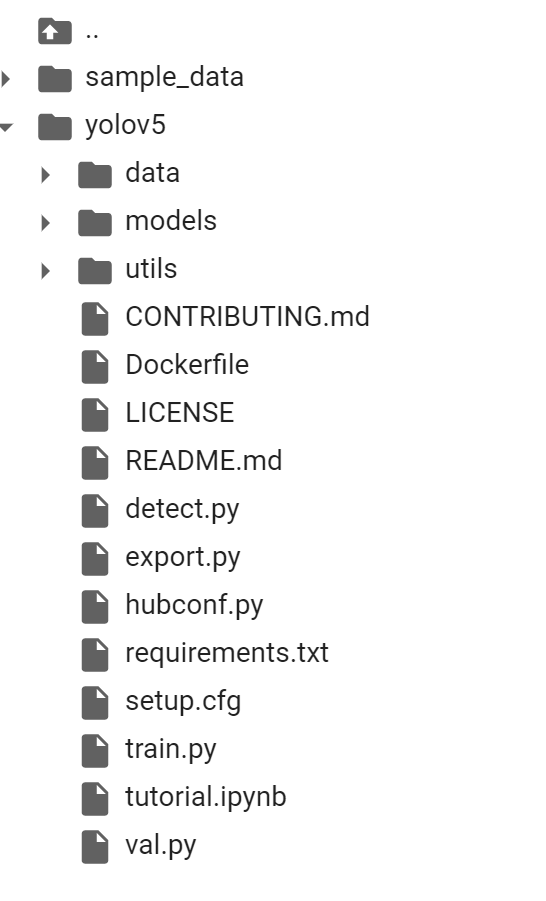
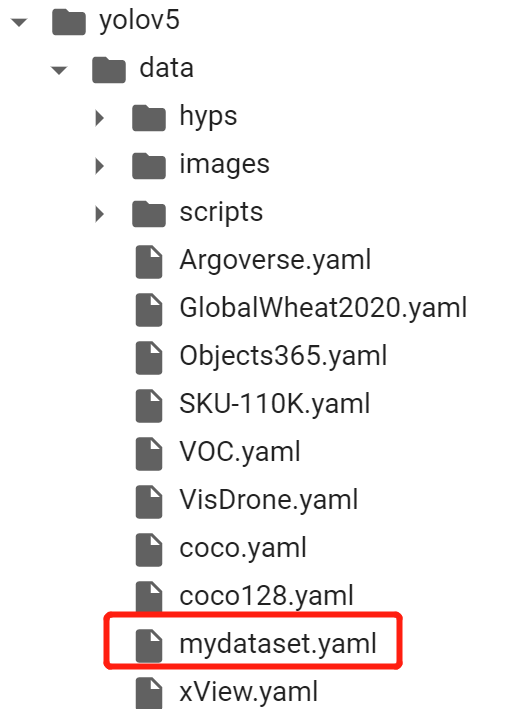
/datadiretory is where to put the dataset configuration file, hyperparameters and testing images.
data
- The
yamlfiles are the dataset configuration files (will explain in the following) /imagediretory is where to put the testing images/scriptincludes the.shscripts to run the code/hypsis where to set the hyperparameters
data configuration – yaml file
When we want to train our model on a certain dataset, the programme will first take a look at this directory and search for the dataset configuration file.
Like a simple json file, the syntax of yaml is straightforward: it has only key and value. Let’s take a look at the official coco128.yaml.
path: ../datasets/coco128  # dataset root dir
train: images/train2017  # train images (relative to 'path') 128 images
val: images/train2017  # val images (relative to 'path') 128 images
test:  # test images (optional)

# Classes
nc: 80  # number of classes
names: ['person', 'bicycle', 'car', 'motorcycle', 'airplane', 'bus', 'train', 'truck', 'boat', 'traffic light',
        'fire hydrant', 'stop sign', 'parking meter', 'bench', 'bird', 'cat', 'dog', 'horse', 'sheep', 'cow',
        'elephant', 'bear', 'zebra', 'giraffe', 'backpack', 'umbrella', 'handbag', 'tie', 'suitcase', 'frisbee',
        'skis', 'snowboard', 'sports ball', 'kite', 'baseball bat', 'baseball glove', 'skateboard', 'surfboard',
        'tennis racket', 'bottle', 'wine glass', 'cup', 'fork', 'knife', 'spoon', 'bowl', 'banana', 'apple',
        'sandwich', 'orange', 'broccoli', 'carrot', 'hot dog', 'pizza', 'donut', 'cake', 'chair', 'couch',
        'potted plant', 'bed', 'dining table', 'toilet', 'tv', 'laptop', 'mouse', 'remote', 'keyboard', 'cell phone',
        'microwave', 'oven', 'toaster', 'sink', 'refrigerator', 'book', 'clock', 'vase', 'scissors', 'teddy bear',
        'hair drier', 'toothbrush']  # class names


# Download script/URL (optional)
download: https://github.com/ultralytics/yolov5/releases/download/v1.0/coco128.zip
After parsing this yaml file, if the value of download is not empty, the programme will first download the dataset from the link.
Train, val, test path should be defined in this file, so programme can know where stores the dataset.
dataset organization
Generally, the dataset is organized as the following structure.
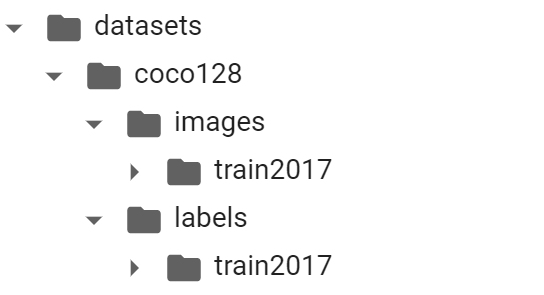
images/train2017 includes all the images for training, while labels/train2017 is where the labels are stored.
Build Your Own Dataset
In many cases, we need to build dataset by ourselves and train our YOLO on it. This part I will introduce two ways to make it: open dataset managment tool FiftyOne, online labelling tool makesense.ai.
FiftyOne
FiftyOne is an open-source tool to build high quality datasets. Install the python package first.
!pip install fiftyoneWe can build our datasets by extracting samples from big public open datasets and combines them together.
For example:
import fiftyone as fo
import fiftyone.zoo as foz
dataset = foz.load_zoo_dataset(
"open-images-v6",
split="train",
label_types=["detections", "classifications"],
classes = ['Apple', 'Banana', 'Carrot'],
max_samples=3000,
seed=51,
shuffle=True,
dataset_name="food_train",
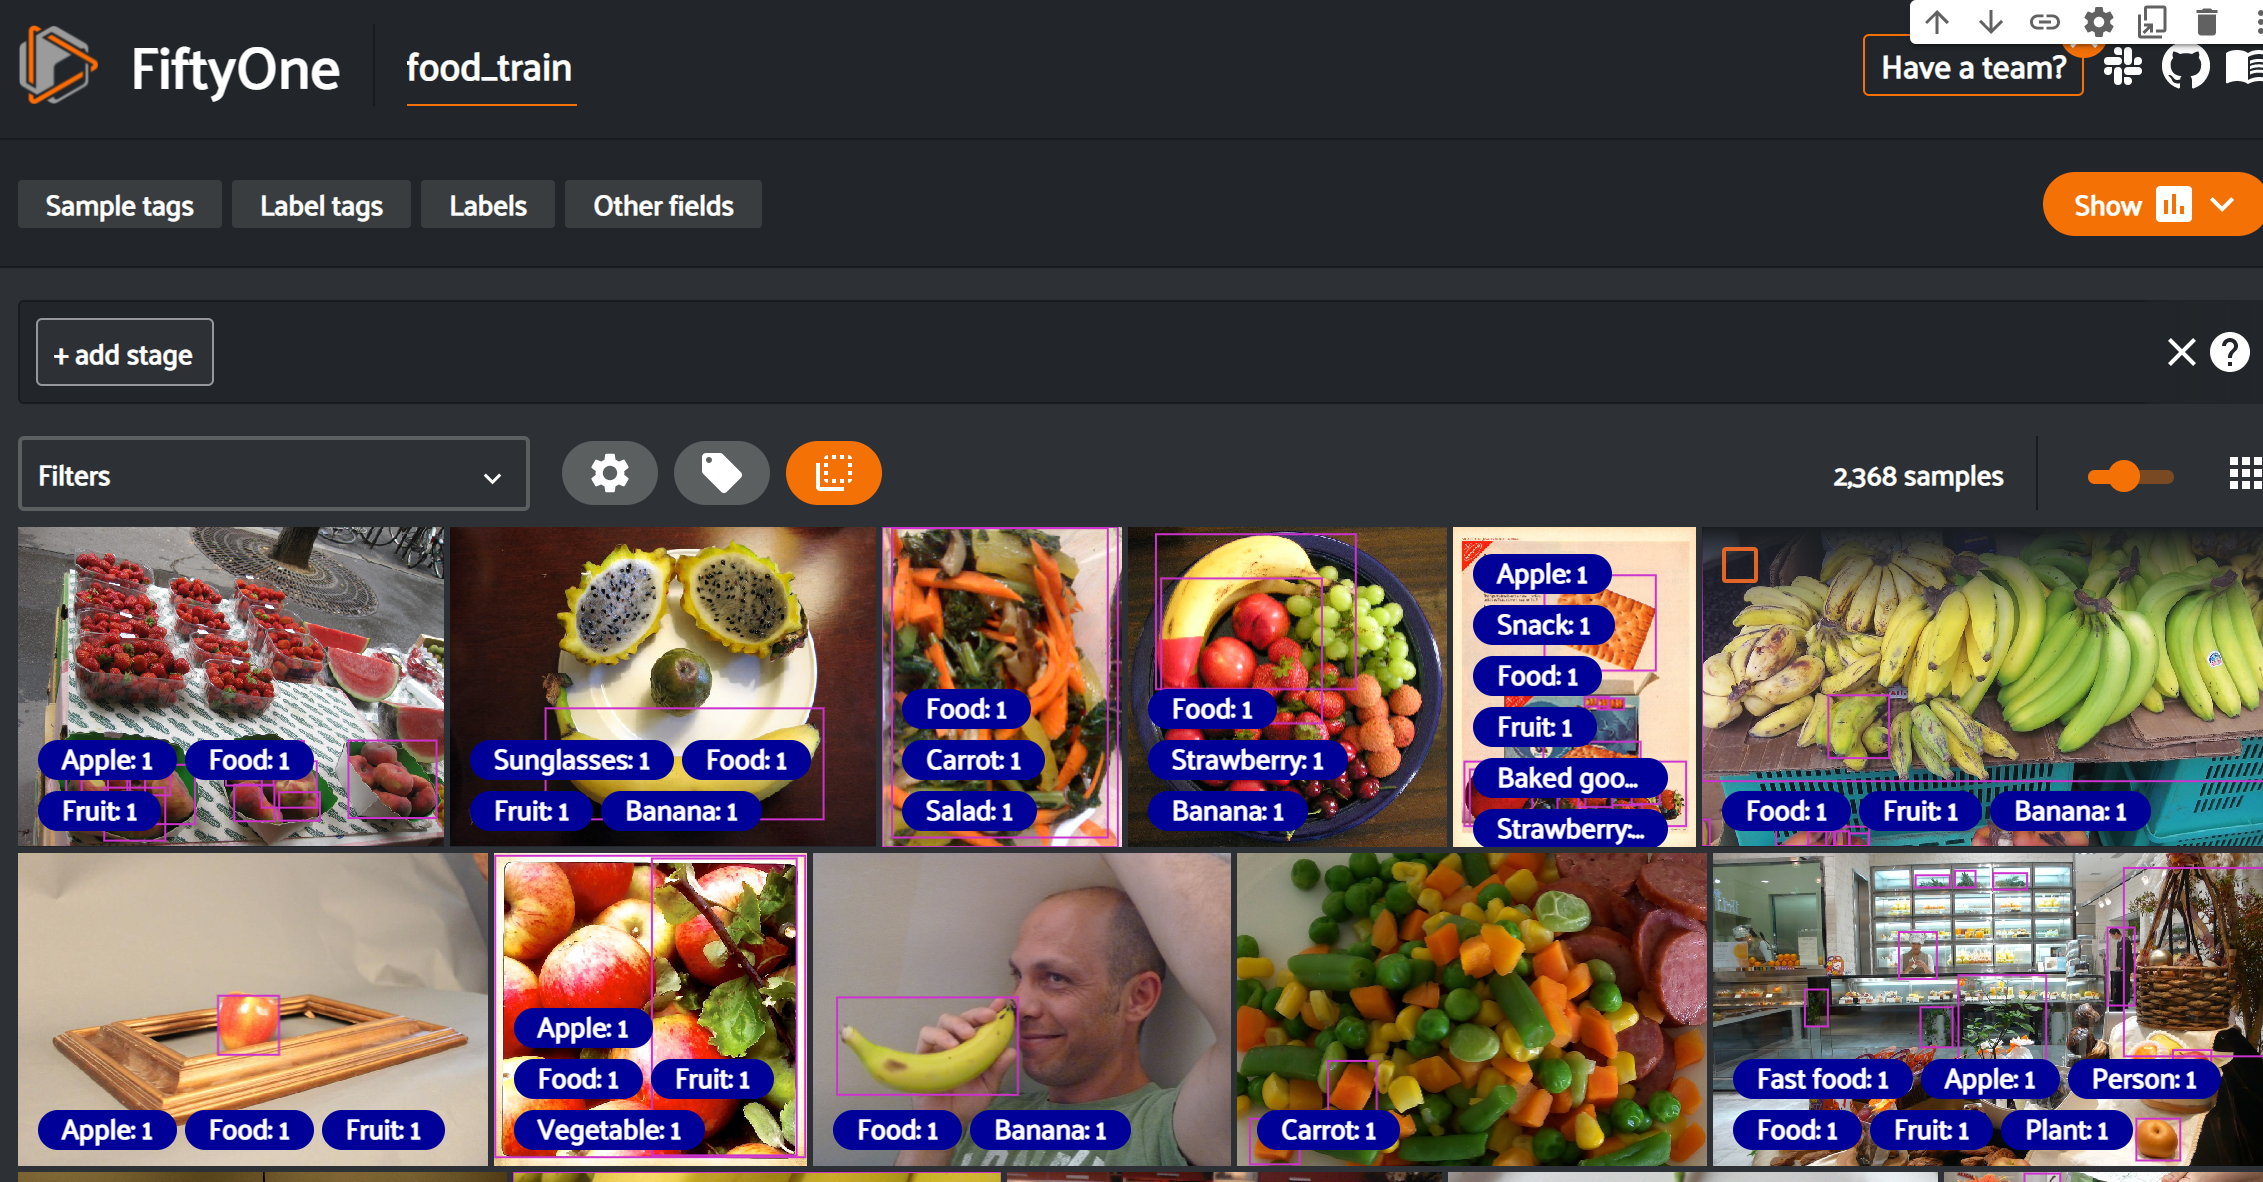
)We collect 3000 training images includes [‘Apple’, ‘Banana’, ‘Carrot’] from open-images-v6 dataset. Building the validation dataset is similar.
session = fo.launch_app(dataset)- visualization of the dataset
Makesense.ai
If we are not satisfied with public dataset, then we should label the image by ourselves.
Online image labelling tool makesense.ai would be a good choice.
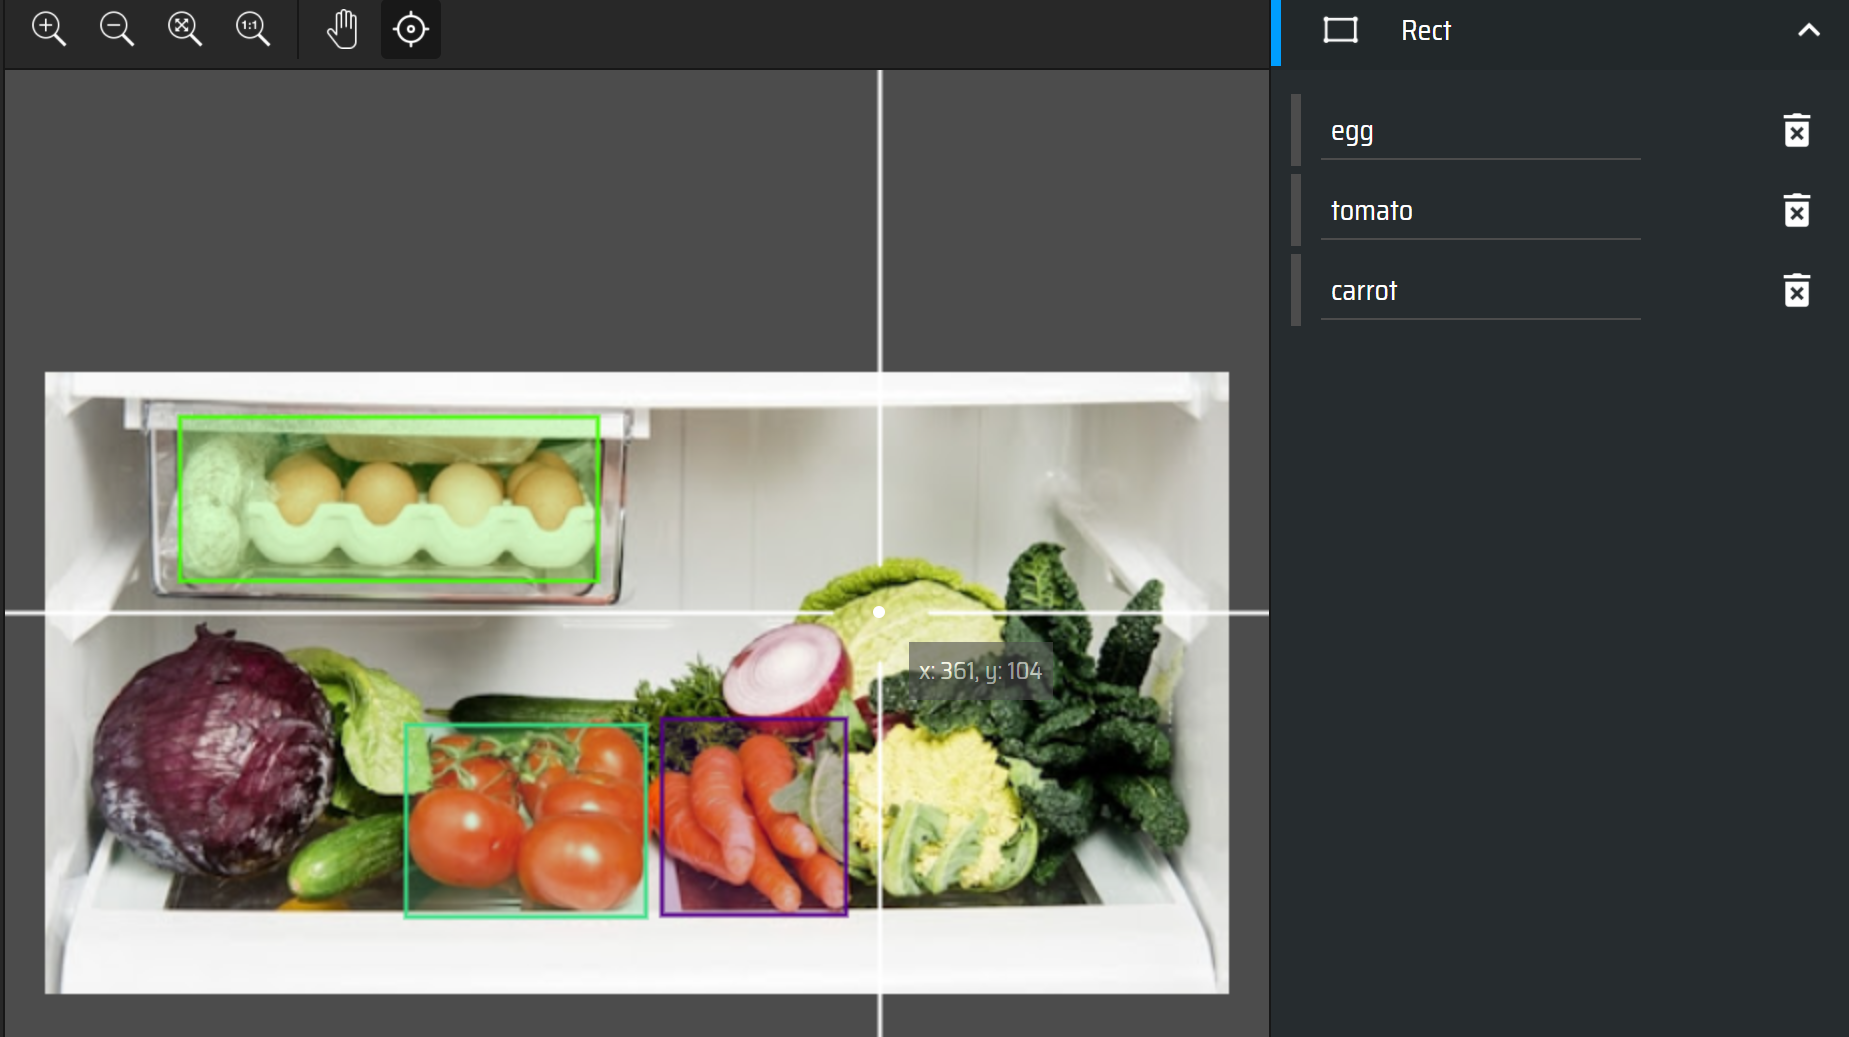
After labelling, export yolo format file by clicking Actions -> Export Annotations.
Model Training and Testing
After building custom dataset, we should write our own yaml file.
path: ../datasets/mydataset  # dataset root dir
train: images/train  # train images (relative to 'path') 128 images
val: images/val  # val images (relative to 'path') 128 images

nc: 3
names: ['Apple', 'Banana', 'Carrot']
After properly set the yaml file and put it inside /data, run the following code to start our YOLO training!
!python train.py --img 640 --batch 20 --epochs 10 --data coco128.yaml --weights yolov5s.pt --cacheExplanation for each parameters:
--img: image size--batch: batch size--epochs: epoch number--data: the location of dataset configuration file--weights: the location of model weight--cache: load all dataset into RAM
training details
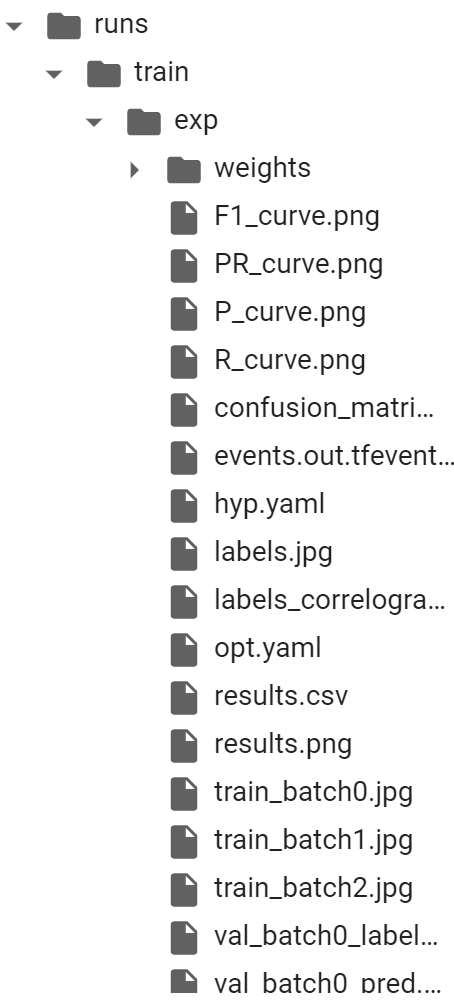
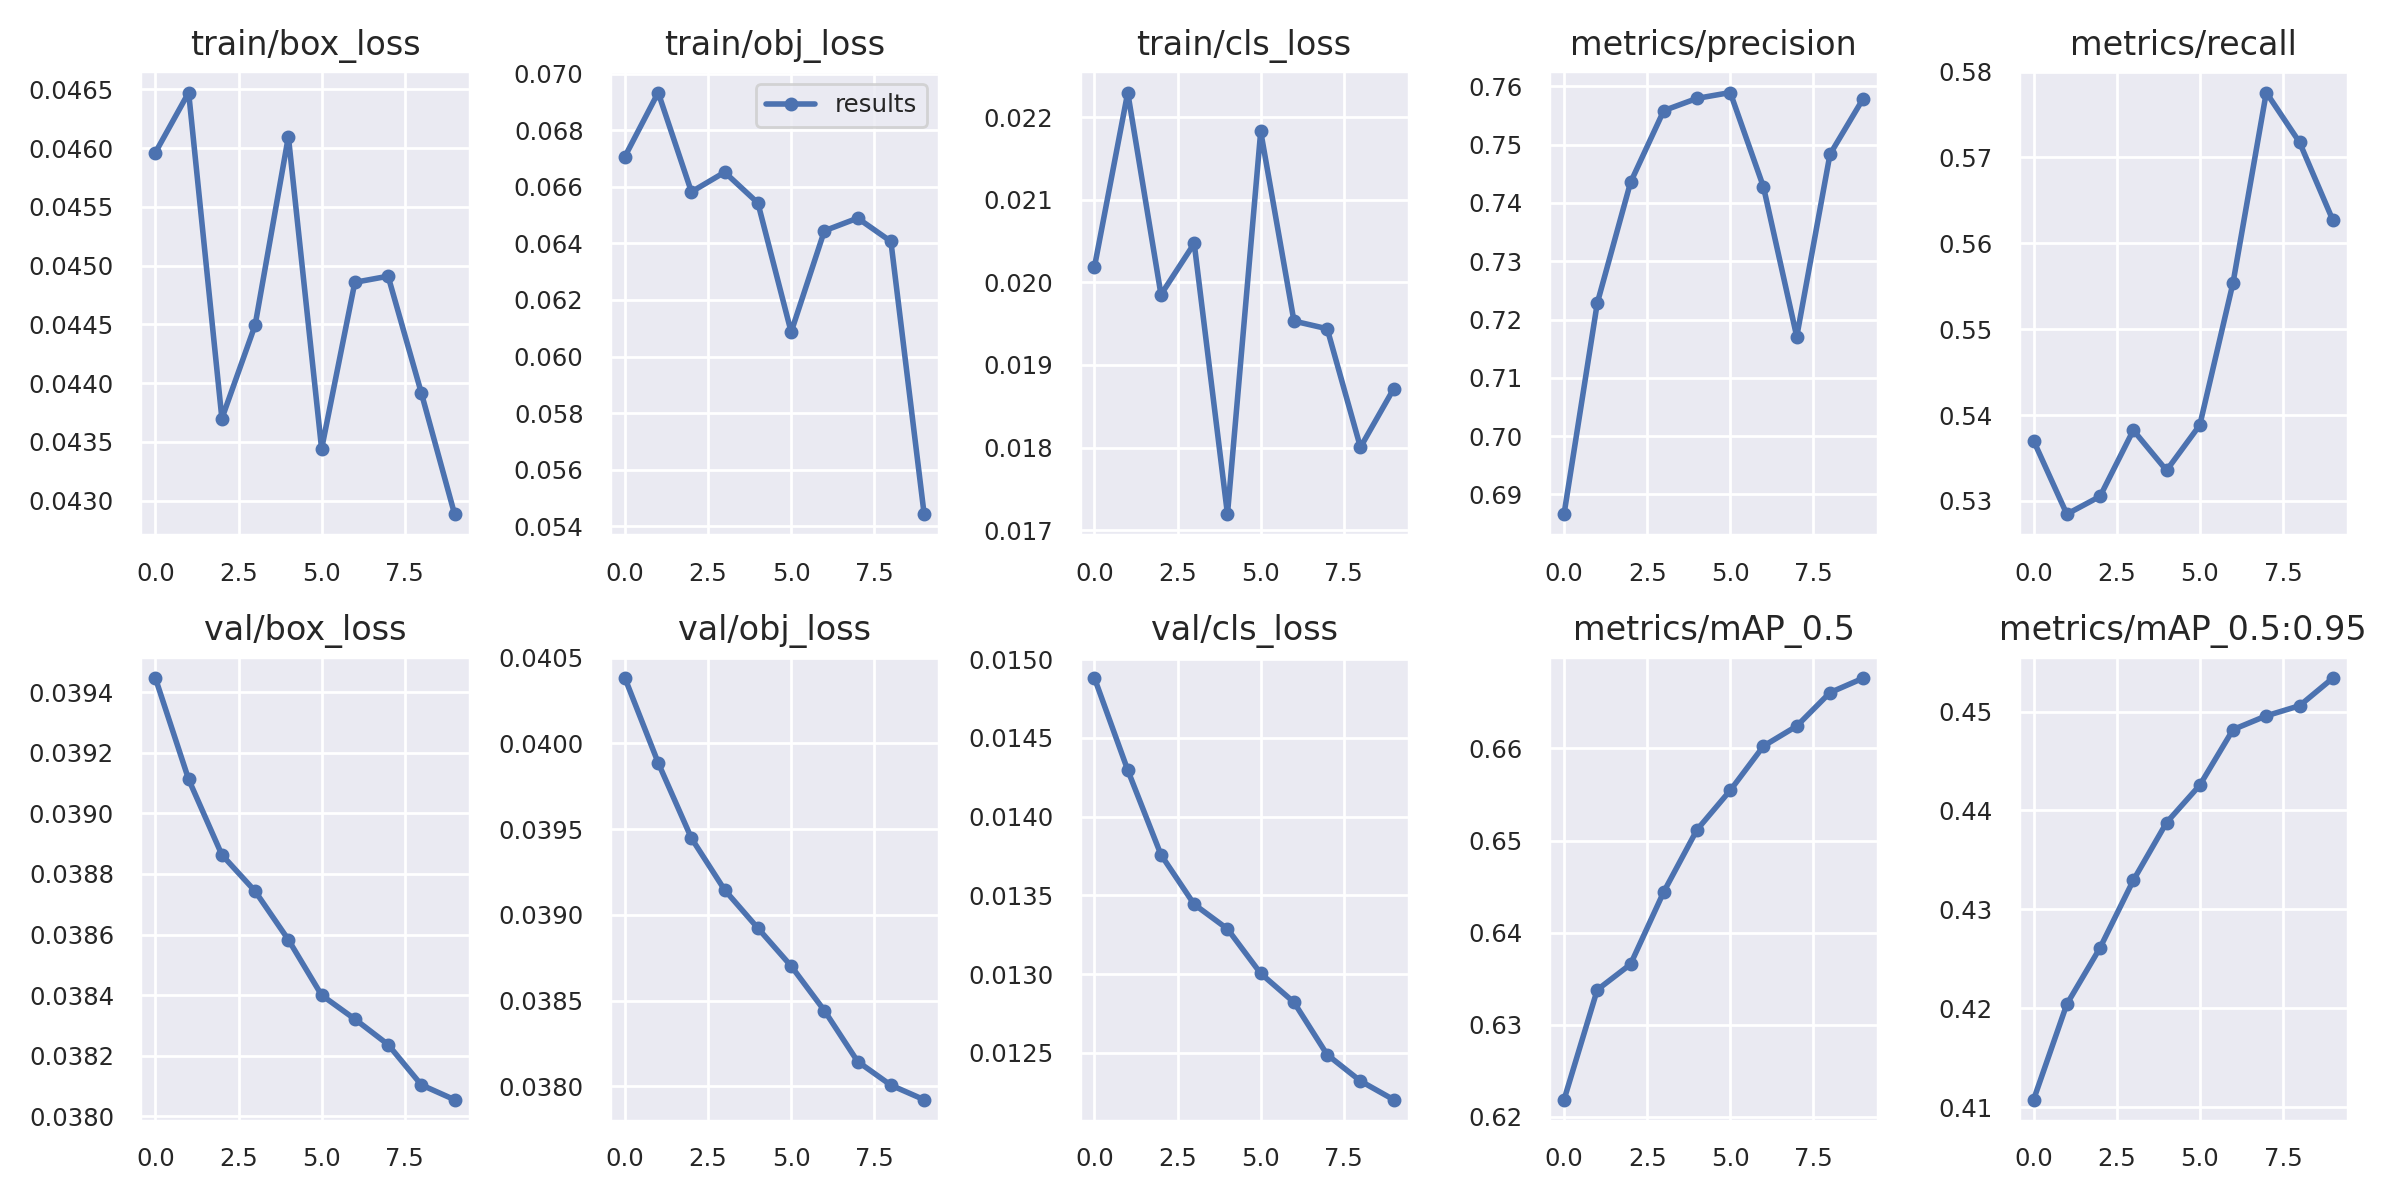
We can go to runs/train/exp to see more details about the training.
The details of each trial are saved in /run/train/exp, the author already implement the visualization for training results, including curve, confusion matrix, sample snapshot etc.
testing
!python detect.py --weights /content/yolov5/runs/train/exp/weights/best.pt --img 640 --conf 0.2 --source data/images/Explanation of parameters:
--weights: model weights, we can use the best model we trained--conf: confidence score threshold--source: testing images path
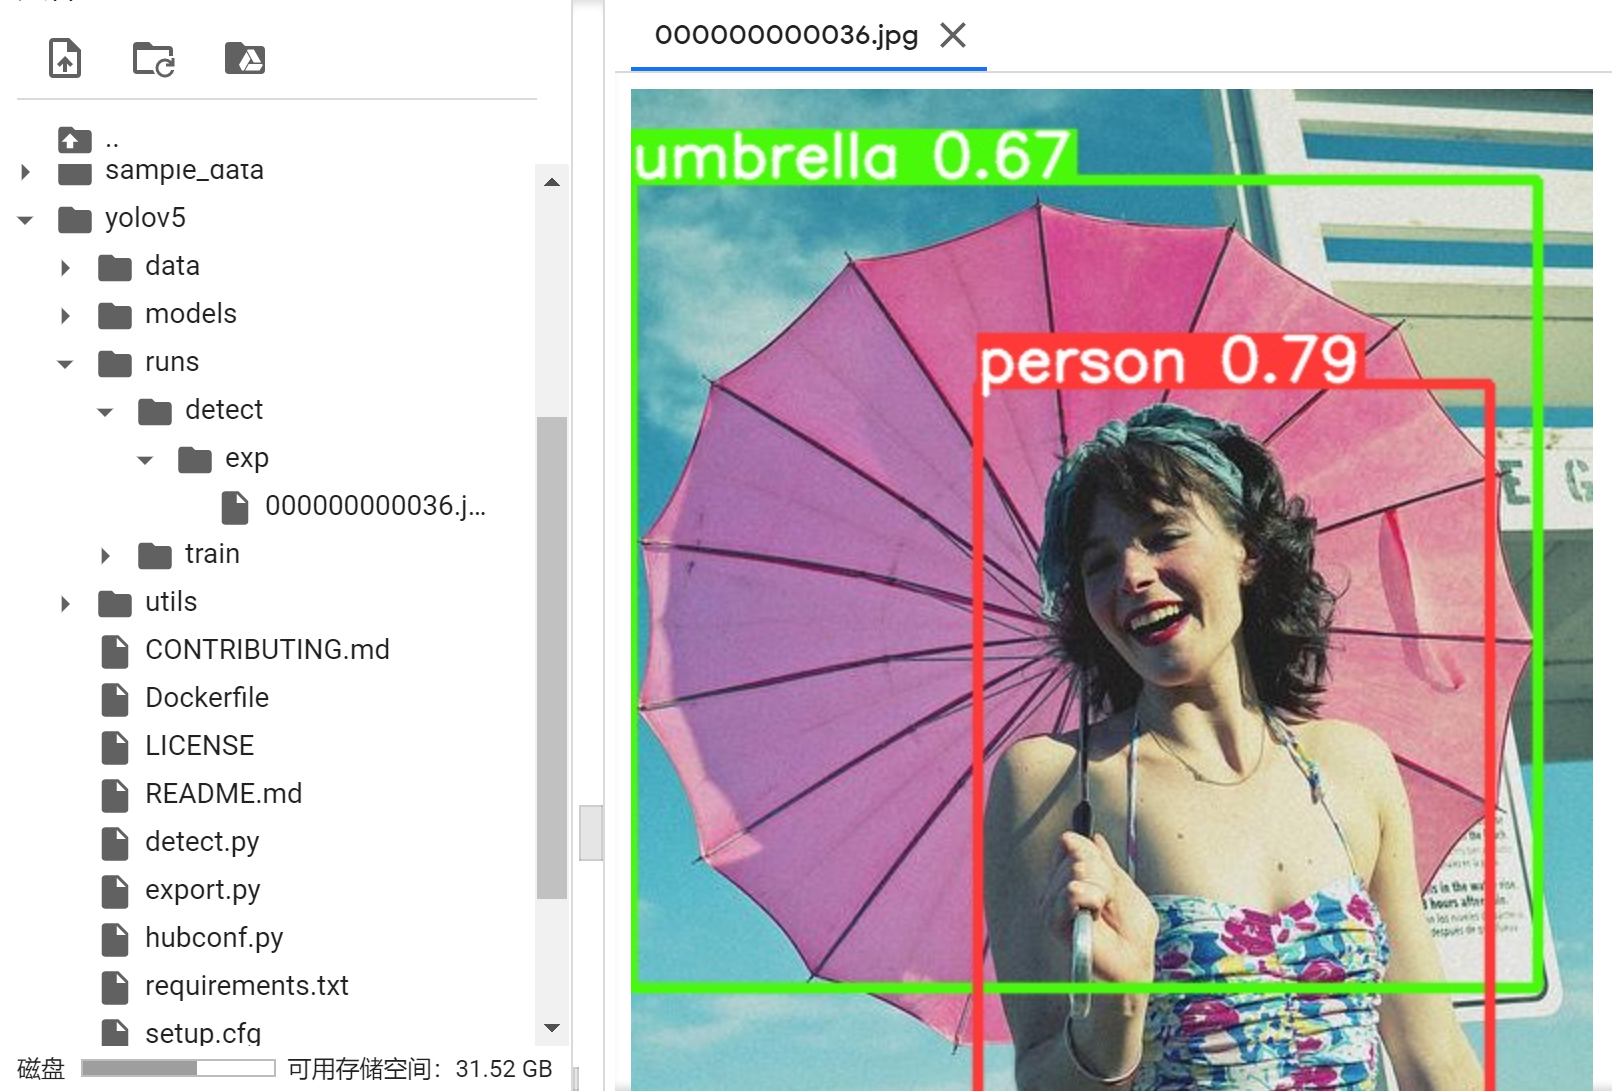
If everything goes smoothly, we can walk into /runs/detect/exp to have a look.
- Post link: https://scnujackychen.github.io/2021/11/04/YOLO5/
- Copyright Notice: All articles in this blog are licensed under unless otherwise stated.
若没有本文 Issue,您可以使用 Comment 模版新建。
GitHub IssuesGitHub Discussions